
Oh, hey there, fellow dessert lover! Have you ever had one of those days where you just *crave* something sweet, something utterly delightful, but the thought of turning on the oven, waiting for it to preheat, and then, y’know, *baking*, just feels like too much? Yeah, me too! That’s precisely why I fell head over heels for the magic of no-bake desserts. And today, I’m practically bursting to share my absolute favorite discovery: No-Bake Pies Made Three Ways: Easy, Classic, and Irresistibly Delicious!
I remember the first time I made a no-bake pie. It was a scorching summer day, and the idea of a hot kitchen was a hard no. I whipped up a simple chocolate one, and honestly, it felt like cheating. But then that first cool, creamy bite hit, and I was hooked! It was so ridiculously simple, yet so satisfying. Since then, I’ve perfected not one, not two, but *three* incredible versions that are guaranteed to impress, no oven required. Get ready to have your dessert game changed!

Why You’ll Love These No-Bake Pies Made Three Ways
Honestly, what’s not to love? These pies are my go-to for so many reasons. They’re super simple, they practically make themselves (okay, maybe with a little help from you!), and they taste absolutely incredible. You get three distinct, crowd-pleasing flavors, all with minimal fuss. It’s a win-win-win!
- Effortless Elegance: Seriously, they look fancy but are ridiculously easy.
- No Oven, No Sweat: Perfect for hot days or when your oven’s busy.
- Delicious Variety: Something for every craving – chocolate, lemon, or peanut butter!
The Ultimate Convenience of No-Bake Pies
This is probably my favorite part! The “no oven required” bit is a game-changer. It means you can whip up a fantastic dessert even when it’s sweltering outside, or when your oven is already packed with dinner. It saves so much time and makes dessert prep feel like a breeze, not a chore. Perfect for busy weeknights or last-minute potlucks!
Essential Ingredients for No-Bake Pies Made Three Ways
Alright, let’s talk ingredients! One of the best things about these no-bake pies is that they use pretty standard stuff you probably already have, or can easily grab at any grocery store. No fancy, hard-to-find items here, just good, honest ingredients that come together to create magic. Here’s what you’ll need to gather for all three of these beauties:
- 1 (8 ounce) package cream cheese, softened (this is super important!)
- 1 (14 ounce) can sweetened condensed milk
- 1/3 cup lemon juice (freshly squeezed is always best, but bottled works too!)
- 1 teaspoon vanilla extract
- 1 (9 inch) graham cracker crust (the pre-made kind is your friend here!)
- 1 (3.9 ounce) package instant chocolate pudding mix (make sure it’s INSTANT!)
- 1 1/2 cups cold milk
- 1 (8 ounce) container whipped topping, thawed (like Cool Whip, for ease!)
- 1 cup creamy peanut butter
- 1/2 cup powdered sugar
- 1/4 cup milk
- 1 (9 inch) chocolate cookie crust
- Chocolate shavings for garnish (optional, but so pretty!)
- Lemon slices for garnish (optional)
- Chopped peanuts for garnish (optional)
Key Components for Your No-Bake Pies
Each of these ingredients plays a really important role in getting that perfect no-bake texture and flavor. For instance, that softened cream cheese and sweetened condensed milk are the backbone of the lemon pie – they give it that dreamy, smooth, and rich consistency. And for the chocolate pie, using *instant* pudding mix is key; it thickens up so beautifully without any cooking. Trust me, don’t try to use cook-and-serve here!
How to Create Your No-Bake Pies Made Three Ways
Okay, this is where the magic really happens, and trust me, it’s easier than you think! I’m going to walk you through each pie, step-by-step. Just remember, the biggest “cooking” skill you need here is patience for the chilling time. That’s crucial for getting those perfect slices!
Crafting the Easy Chocolate No-Bake Pie
First up, the chocolate dream! Grab a medium-sized bowl. You’re going to whisk together that instant chocolate pudding mix with 1½ cups of cold milk. Whisk it well, like you mean it, until it starts to thicken up nicely. Then, gently fold in about half of your thawed whipped topping. Don’t overmix here, just get it combined. Pour that glorious chocolate mixture into your graham cracker crust and spread it out evenly. Now, pop it in the fridge for at least 2 hours, or until it’s nice and set. You want it firm enough to slice cleanly!
Assembling the Classic Lemon Icebox No-Bake Pie
Oh, this one is pure sunshine in a pie! In a large bowl, beat your softened cream cheese until it’s super smooth. No lumps allowed here, friends! Gradually beat in the sweetened condensed milk until everything is beautifully combined. Then, stir in the lemon juice and that lovely vanilla extract. Pour this creamy, tangy filling into your other graham cracker crust and spread it out. Now, this one needs a little more chill time – at least 4 hours, or even better, overnight. Trust me, it’s worth the wait for that perfect, firm texture.
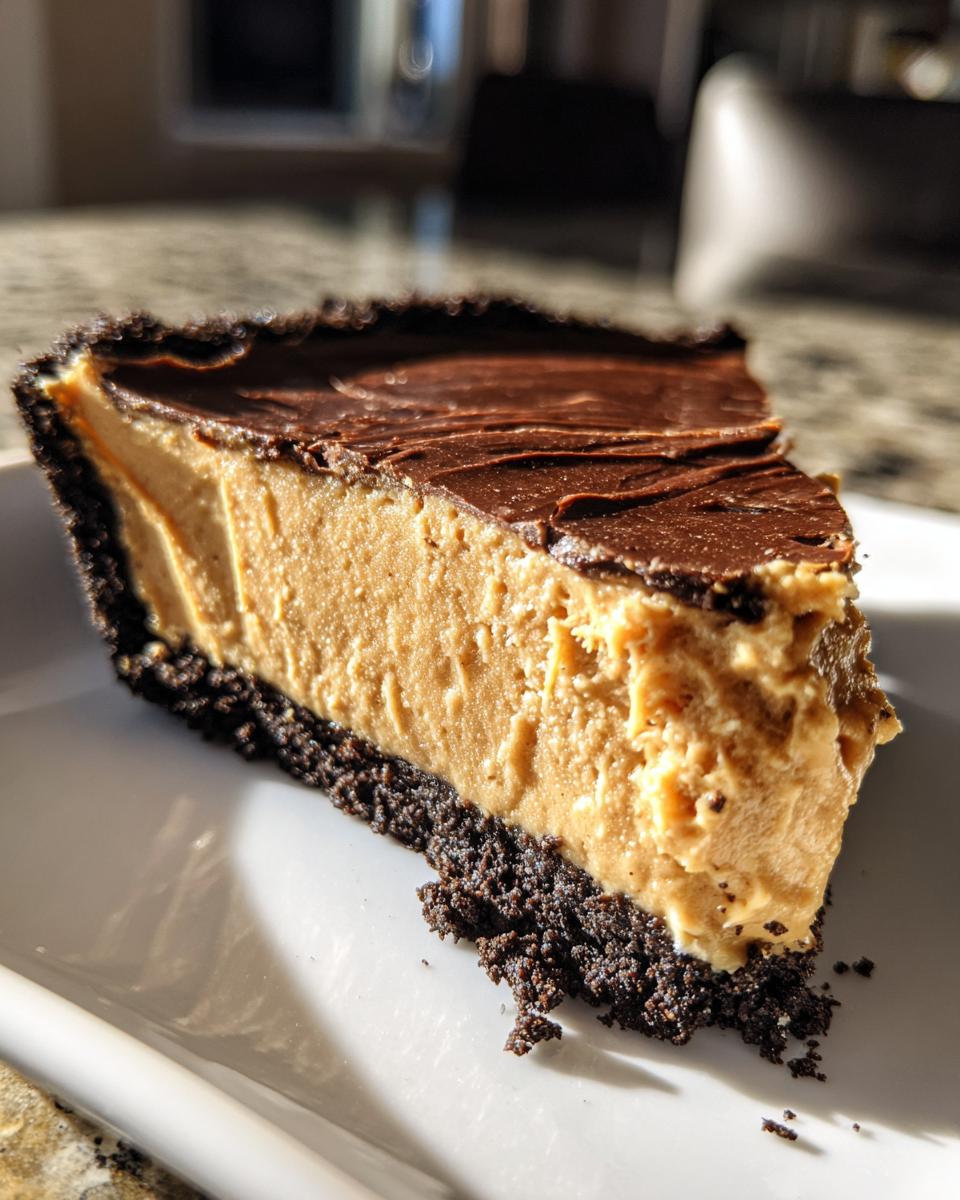
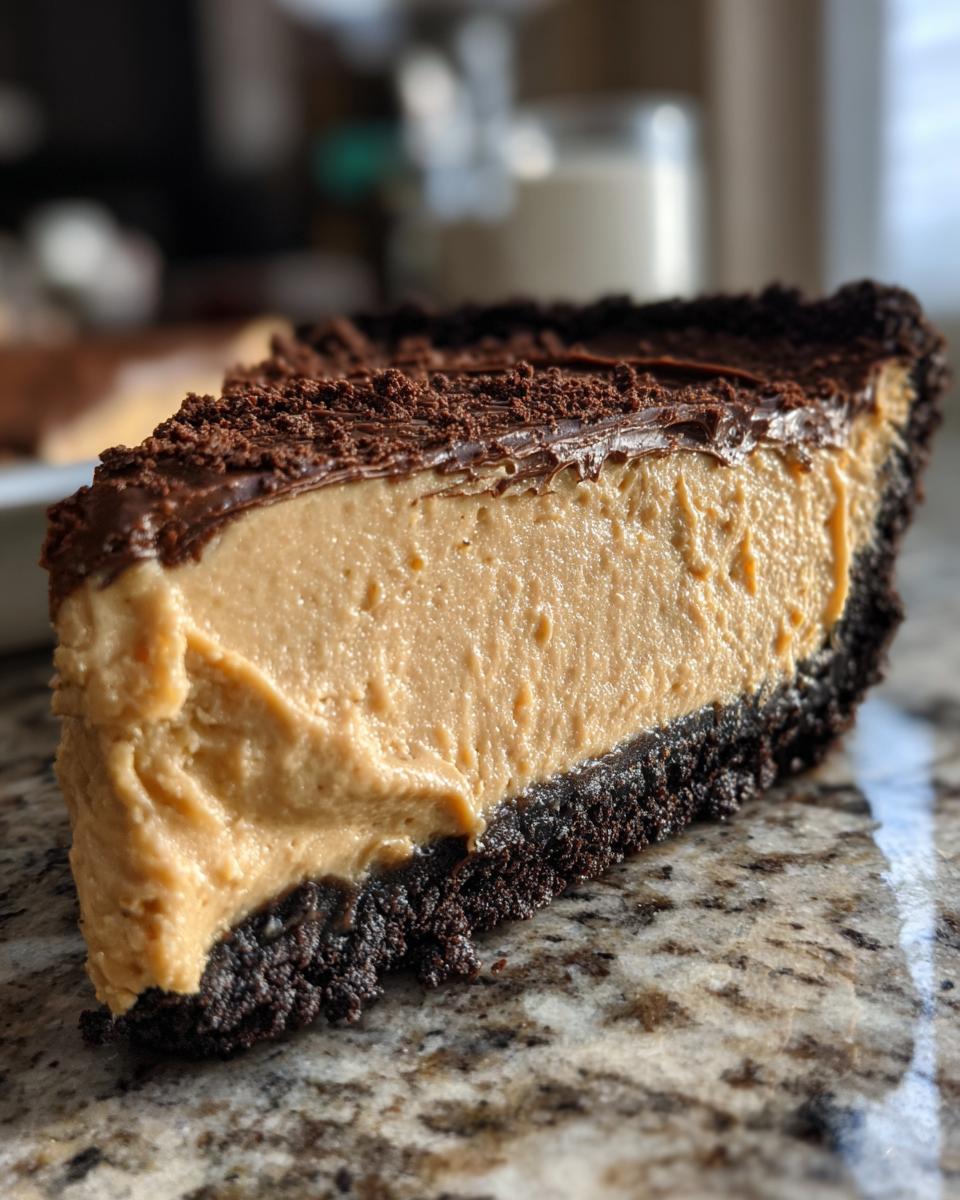
Making the Irresistible Peanut Butter No-Bake Pie
Peanut butter lovers, rejoice! This one is for you. In a large bowl, combine your creamy peanut butter, powdered sugar, and ¼ cup of milk. Beat it until it’s smooth and creamy. Next, fold in the *remaining* whipped topping. Again, be gentle! You want to keep it light and airy. Spoon this deliciousness into your chocolate cookie crust and spread it evenly to the edges. Pop it in the fridge for at least 2 hours, or until it’s set enough for you to slice and devour. Garnish with chopped peanuts if you’re feeling fancy!
Tips for Perfect No-Bake Pies Made Three Ways
Okay, so you’ve got the basic steps down, but I’ve picked up a few little tricks over the years that really elevate these no-bake wonders. They’re simple things, but they make a big difference in getting that perfect texture and flavor every single time. Trust me, these tips are gold!
Ensuring Your No-Bake Pies Set Properly
This is probably the most important thing! Chilling time isn’t just a suggestion, it’s a *must*. Make sure your cream cheese is super soft for the lemon pie, and don’t skimp on the time in the fridge. Those hours allow the fillings to firm up beautifully, so you get nice, clean slices instead of a delicious, but messy, puddle. Also, make sure your milk for the chocolate pudding is really cold, it helps it thicken faster!
Frequently Asked Questions About No-Bake Pies
I get a lot of questions about these pies, and I love it! It shows you’re really thinking about how to make them perfect. Here are some of the most common ones I hear, with my tried-and-true answers. Don’t be shy if you have more!
Can I Make No-Bake Pies Ahead of Time?
Absolutely, and I highly recommend it! These no-bake beauties are actually better when they’ve had plenty of time to chill and firm up. I usually make mine the day before I plan to serve them. This gives them ample time to set perfectly, and it takes the stress out of last-minute dessert prep. Just cover them loosely with plastic wrap and keep them in the fridge.
What are Common Substitutions for My No-Bake Pies?
You bet! For the crusts, you can totally get creative. Try crushed Oreos for the chocolate or peanut butter pies, or even vanilla wafers for the lemon. If you’re not a fan of whipped topping, you can make your own homemade whipped cream, but just know it might not hold its shape quite as long. For the peanut butter pie, you can use crunchy peanut butter if you like that texture! And for the lemon, lime juice works beautifully if you prefer a lime icebox pie instead.
Storage and Reheating Instructions for Your No-Bake Pies
Once you’ve devoured your first slices (and trust me, you will!), you’ll want to store any leftovers properly to keep them fresh and delicious. Since these are no-bake, there’s no reheating happening here! Just keep them chilled. Always store your pies in the refrigerator, covered loosely with plastic wrap or in an airtight container. This keeps them from drying out and absorbing any fridge odors. They’ll stay good for about 3-4 days, but honestly, they rarely last that long in my house!
Estimated Nutritional Information for No-Bake Pies
Okay, so you’re curious about the nitty-gritty numbers, and I totally get that! While I’ve included some estimated nutritional info based on standard ingredients, please remember that these are just estimates. The exact values can totally swing depending on the specific brands you use, whether you go for full-fat or reduced-fat cream cheese, or even the type of crust. Think of it as a helpful guide, not a strict rulebook!
Share Your No-Bake Pies Made Three Ways!
So, you’ve made them, you’ve tasted them, and now you’re probably just as obsessed as I am! I’d absolutely LOVE to see your no-bake pie creations. Snap a pic and share it on social media – tag me, or just let me know in the comments below which pie was your favorite! Did you make all three? Did you try a fun new garnish? Let’s connect and share the no-bake love!
Print
No-Bake Pies Made Three Ways: One Brilliant Fix
- Total Time: 4 hours 30 minutes
- Yield: 3 pies (8 servings each) 1x
- Diet: Vegetarian
Description
Discover three simple ways to make delicious no-bake pies: an easy chocolate pie, a classic lemon icebox pie, and an irresistible peanut butter pie. Perfect for any occasion, these pies require minimal effort and no oven.
Ingredients
- 1 (8 ounce) package cream cheese, softened
- 1 (14 ounce) can sweetened condensed milk
- 1/3 cup lemon juice
- 1 teaspoon vanilla extract
- 1 (9 inch) graham cracker crust
- 1 (3.9 ounce) package instant chocolate pudding mix
- 1 1/2 cups cold milk
- 1 (8 ounce) container whipped topping, thawed
- 1 cup creamy peanut butter
- 1/2 cup powdered sugar
- 1/4 cup milk
- 1 (9 inch) chocolate cookie crust
- Chocolate shavings for garnish (optional)
- Lemon slices for garnish (optional)
- Chopped peanuts for garnish (optional)
Instructions
- For the Easy Chocolate Pie: In a medium bowl, whisk together the instant chocolate pudding mix and 1 1/2 cups cold milk until thickened. Fold in half of the whipped topping. Pour the mixture into the graham cracker crust and spread evenly. Chill for at least 2 hours, or until set.
- For the Classic Lemon Icebox Pie: In a large bowl, beat the softened cream cheese until smooth. Gradually beat in the sweetened condensed milk until well combined. Stir in the lemon juice and vanilla extract. Pour the mixture into the graham cracker crust and spread evenly. Chill for at least 4 hours, or until firm.
- For the Irresistible Peanut Butter Pie: In a large bowl, beat the creamy peanut butter, powdered sugar, and 1/4 cup milk until smooth. Fold in the remaining whipped topping. Pour the mixture into the chocolate cookie crust and spread evenly. Chill for at least 2 hours, or until set.
- Garnish as desired before serving.
Notes
- Ensure cream cheese is softened for a smooth filling.
- Chilling times are crucial for pies to set properly.
- Adjust sweetness to your preference.
- Store leftover pie in the refrigerator.
- Prep Time: 30 minutes
- Cook Time: 0 minutes
- Category: Dessert
- Method: No-Bake
- Cuisine: American
Nutrition
- Serving Size: 1 slice
- Calories: 350
- Sugar: 35g
- Sodium: 300mg
- Fat: 20g
- Saturated Fat: 10g
- Unsaturated Fat: 8g
- Trans Fat: 0g
- Carbohydrates: 40g
- Fiber: 2g
- Protein: 5g
- Cholesterol: 30mg
Keywords: no-bake pie, chocolate pie, lemon icebox pie, peanut butter pie, easy dessert, classic dessert