
Okay, buckle up, friends, because we’re about to dive headfirst into the glorious, sticky, incredibly rewarding world of homemade jam! There’s just nothing like popping open a jar of sunshine you made yourself, right? The smell that fills your kitchen as it simmers… pure magic. And spread on warm toast? Forget about it!
Today, I’m so excited to share something really special with you: I teach you 4 exquisite jam recipes! We’re not just making *a* jam; we’re tackling four absolute classics – Apricot, Strawberry, Raspberry, and Peach. This collection is fantastic because you get to experience the nuances of different fruits, each with its own personality in jam form. I’ve been making jam in my kitchen for years, tweaking and perfecting, and these four are my absolute go-tos. Trust me, once you make these, you’ll never want store-bought again!

Why I Teach You 4 Exquisite Jam Recipes
Okay, so why *these* four jams, and why make them yourself? Honestly, it’s a game-changer! Here’s the deal:
- Variety is the Spice of Life (and Breakfast!): Learning these four means you’ve got a little something for everyone. Sweet strawberry, slightly tart raspberry, sunny apricot, and comforting peach – you’re covered!
- Flavor You Can’t Buy: Homemade jam just tastes *more*. More like the actual fruit, more vibrant, more like sunshine in a jar. You control the flavor, simple as that.
- Seriously Satisfying: There’s a deep joy in taking fresh fruit and transforming it into something so delicious and beautiful. It’s a kitchen win, every time.
- Endless Possibilities: Jam isn’t just for toast! These are amazing in thumbprint cookies, swirled into yogurt, dolloped on scones, or even paired with cheese. So versatile!

Equipment Needed to I Teach You 4 Exquisite Jam Recipes
Alright, before we get our hands sticky with all that gorgeous fruit and sugar, let’s talk tools. You don’t need a fancy kitchen full of gadgets, but a few key things will make this jam-making adventure smooth and safe. Trust me, having the right stuff on hand makes all the difference!
- A really big, heavy-bottomed pot (like a Dutch oven) is a must for preventing scorching.
- Canning jars, lids, and bands – make sure they’re clean and ready!
- A jar lifter – seriously, don’t skip this for safety when dealing with hot jars.
- A canning funnel helps keep things tidy when filling jars.
- A wooden spoon or heatproof spatula for stirring.
- A boiling water canner (or a pot deep enough to cover jars by an inch or two).
Ingredients for These Exquisite Jam Recipes
Okay, let’s talk about the good stuff – the ingredients! This is where the magic starts. The absolute key here is using the best, ripest fruit you can find. It makes a world of difference, trust me. Here’s what you’ll need for our four exquisite jam recipes:
- For Apricot Jam: You’ll want about 4 cups of chopped, ripe apricots (about 2 pounds before pitting).
- For Strawberry Jam: Grab about 6 cups of sliced fresh strawberries (around 2.5 pounds, hulled).
- For Raspberry Jam: We’ll need about 5 cups of whole, beautiful raspberries (roughly 2 pounds).
- For Peach Jam: Get about 4 cups of peeled and sliced peaches (again, about 2 pounds before pitting).
- Granulated Sugar: The quantity varies depending on the fruit and how sweet you like it, but have plenty on hand! We’ll get to the specifics later.
- Fresh Lemon Juice: This is crucial for flavor and helping the jam set! The amount will vary slightly for each fruit.
Seriously, use fruit that smells amazing and is perfectly ripe, but not mushy. It’s the heart of your jam!
Detailed Notes on Ingredients for Your Exquisite Jam Recipes
Alright, let’s get a little more specific about these ingredients, because they each play a starring role! Picking the right fruit is number one – ripe, yes, but not *too* soft. That perfect point gives you the best flavor and natural pectin. Sugar isn’t just for sweetness; it helps preserve the jam and contributes to that lovely texture. And lemon juice? Oh, that little bit of acidity is a total flavor booster, making the fruit taste brighter, and it’s absolutely essential for helping the jam set properly, thanks to the pectin it activates. Honestly, I don’t recommend swapping out the lemon juice here; it’s too important for the structure and safety of your jam!
How I Teach You to Prepare These Exquisite Jam Recipes
Okay, deep breath! Making jam might seem a little intimidating if you’ve never done it, but I promise, we’ll take it step by step. Think of it as a kitchen adventure! These four recipes follow the same basic process, just with slight variations for the fruit. Let’s get cooking!
Preparing the Fruit for Your Exquisite Jam Recipes
First things first, you’ve got to get your fruit ready. Give everything a good wash under cool running water. For apricots and peaches, you’ll need to pit them and then chop them up. Strawberries just need their green tops hulled before you slice them. Raspberries are the easiest – just wash them gently and leave them whole!
Combining Ingredients and Cooking Your Exquisite Jam Recipes
Now for the fun part! Grab that big, heavy pot. Toss in your prepared fruit, the sugar (the amount depends on the fruit – check the specific recipe notes!), and the fresh lemon juice. Give it a good stir to get everything acquainted. Turn the heat up to medium-high and bring that glorious mixture to a rolling boil. You’ve gotta stir, stir, stir here to make sure nothing sticks to the bottom! Once it’s boiling, reduce the heat and let it simmer. This is where the magic happens! It’ll need anywhere from 15 to 45 minutes, depending on the fruit and how thick you like your jam. Keep stirring occasionally. You’ll see foam forming on top – just skim that off with a spoon and discard it. It makes for prettier jam!
Canning and Sealing Your Exquisite Jam Recipes
While your jam is simmering, make sure your jars are sterilized and warm. You don’t want to put hot jam into cold jars – they could break! Carefully ladle the hot jam into your warm, sterilized jars, leaving about a half-inch of space at the top (we call that headspace). Wipe the rims *really* clean with a damp cloth – any jam on the rim can prevent a good seal. Pop the lids and bands on and tighten them securely, but not so tight you can’t get them off later! Now, carefully place the jars into your boiling water canner. Make sure the water covers the tops of the jars by at least an inch. Bring the water back to a rolling boil and process for the time needed for your altitude and jar size (usually 10-15 minutes). This step is SO important for making your jam safe to store on the shelf! Use your jar lifter to carefully remove the hot jars and set them on a wire rack to cool completely. You’ll hear those satisfying “pop” sounds as they seal – music to a jam maker’s ears! Check the seals after 24 hours.

Expert Tips for Perfecting Your Exquisite Jam Recipes
Okay, you’ve made the jam, you’ve canned it… now for those little extra touches that make it *perfect*! Getting the thickness just right can feel like a bit of a dance; I like to use the cold spoon test – dip a cold spoon into the jam, let it cool for a moment, and see how it runs off. If it sheets off rather than dripping, it’s probably ready! If your jam seems a little runny after cooling, don’t panic! You can always open the jars, pour it back into the pot, and simmer it a bit longer. And for sealing? Make sure those jar rims are spotless before putting on the lids – it’s key to a good seal! Trust your process, and don’t be afraid to experiment a little on thickness once you get the hang of it.
Frequently Asked Questions About These Exquisite Jam Recipes
Okay, I know you might have a few questions buzzing around, especially if you’re new to the jam-making game! That’s totally normal. Here are some things people often ask, and my best answers:
Can I use frozen fruit instead of fresh?
You absolutely can! Thaw it completely first and drain off any extra liquid. The cooking time might be a little longer because frozen fruit tends to release more juice, but it works perfectly fine.
How do I know when the jam is set?
Ah, the million-dollar question! Besides my cold spoon test (see the tips section!), you can use a candy thermometer. Jam is usually considered set when it reaches about 220°F (104°C) at sea level. Or, put a tiny dollop on a plate you’ve chilled in the freezer; if it wrinkles when you push it with your finger, it’s ready!
How long does homemade jam last?
Properly canned and sealed jars of jam stored in a cool, dark place can last for at least a year, often longer! Once you open a jar, pop it in the fridge, and it should be good for a couple of months. Just trust your nose and eyes – if it looks or smells off, it’s time to toss it.
Can I reduce the amount of sugar?
You *can*, but be careful! Sugar is really important for the jam’s texture and for safely preserving it. Reducing it too much can mean your jam doesn’t set well and might spoil faster. If you want less sugar, you might need to add commercial pectin specifically designed for low-sugar recipes. I tend to follow the traditional ratios for the best results and shelf stability.
Storing and Enjoying Your Exquisite Jam Recipes
Once your beautiful jars are sealed and cooled, find a cool, dark place to store them. A pantry or cupboard is perfect! They’ll be happy there for ages. After you open a jar (the best part!), pop it in the fridge. It’ll keep well for several weeks. Now for the fun part – enjoying them! Beyond toast, try swirling them into yogurt, topping pancakes or waffles, using them as a filling for cakes or cookies, or even pairing the fruitier ones with cheese and crackers. The possibilities are delicious!
Print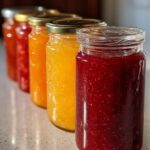
I Teach You 4 Exquisite Jam Recipes
- Total Time: 160 minutes
- Yield: Multiple jars
- Diet: Vegetarian
Description
Learn to make four delicious jam recipes: Apricot, Strawberry, Raspberry, and Peach.
Ingredients
- Apricots
- Strawberries
- Raspberries
- Peaches
- Sugar
- Lemon juice
Instructions
- Prepare the fruit by washing, pitting (for stone fruits), and chopping as needed.
- Combine the prepared fruit with sugar in a large pot according to the specific jam recipe ratios.
- Add lemon juice to the fruit and sugar mixture.
- Bring the mixture to a boil over medium-high heat, stirring constantly.
- Reduce the heat and simmer, stirring occasionally, until the jam thickens to your desired consistency. This can take from 15 to 45 minutes depending on the fruit.
- Skim off any foam that forms on the surface.
- Carefully ladle the hot jam into sterilized jars, leaving about 1/2 inch of headspace.
- Wipe the rims of the jars clean and place lids and bands on tightly.
- Process the jars in a boiling water canner for the time specified for your altitude and jar size (typically 10-15 minutes).
- Remove jars from the canner and let them cool completely on a wire rack. Check seals after 24 hours.
Notes
- Use ripe but not overripe fruit for best results.
- Sterilize jars and lids properly before filling.
- Adjust cooking time based on desired jam thickness.
- Proper processing in a boiling water canner is crucial for shelf stability.
- Prep Time: 60 minutes
- Cook Time: 100 minutes
- Category: Preserves
- Method: Boiling
- Cuisine: Global
Keywords: jam recipes, apricot jam, strawberry jam, raspberry jam, peach jam, homemade jam, canning