
Okay, so let me tell you, making your own cheese at home? It sounds totally intimidating, like something only fancy chefs in Italy can do. But trust me on this one, making **homemade mozzarella cheese** is not just possible, it’s shockingly easy and SO rewarding! Forget those rubbery balls from the store. This stuff is fresh, creamy, and has that perfect little squeak when you bite into it.
The first time I ever tried making it, I was convinced I’d mess it up. I pictured vats of weird liquid and endless stirring. But nope! It’s really just a few simple steps and a little bit of heat. Seeing those curds magically pull away from the whey? It felt like a science experiment and pure kitchen magic all rolled into one. The taste difference is night and day. Once you make your own **homemade mozzarella cheese**, you might never go back to store-bought again!

Why You’ll Love This Homemade Mozzarella Cheese Recipe
Seriously, there are so many reasons why you’re going to fall head over heels for making your own mozzarella at home. It’s kind of a game changer!
- That Fresh Taste: Okay, this is the big one. Nothing, and I mean NOTHING, compares to the creamy, delicate flavor of truly fresh mozzarella you just made yourself. It’s got this subtle sweetness the store stuff just doesn’t have.
- Know What’s In It: You’re in control! Just milk, vinegar, water, and salt. No weird anti-caking things or stabilizers you can’t pronounce. Pure and simple goodness.
- Surprisingly Simple: I know I said it before, but it bears repeating. It’s not complicated! If you can heat milk and stir, you can do this.
- So Rewarding: There’s just something incredibly satisfying about turning a gallon of milk into this beautiful ball of cheese. You’ll feel like a kitchen superhero!
- Perfect for EVERYTHING: This fresh mozzarella is divine on pizza (it melts like a dream!), in a simple caprese salad with juicy tomatoes and basil, or honestly, just torn into pieces and eaten plain.
Trust me, once you try this, you’ll be hooked!
Ingredients for Homemade Mozzarella Cheese
Alright, let’s talk about the magic makers! You really don’t need much to whip up your own batch of **homemade mozzarella cheese**. Just a few simple things you probably already have, or can grab easily from the grocery store.
- 1 gallon whole milk (NOT ultra-pasteurized): This is super important! Ultra-pasteurized milk won’t form curds properly, so look for standard pasteurized whole milk. The higher fat content helps too.
- 1/2 cup white vinegar: This is your acid, what helps the milk separate into curds and whey.
- 1/4 cup cold water: Just to dilute the vinegar a little bit.
- 1/2 teaspoon salt: For flavor! You can adjust this a tiny bit to your taste later, but this is a good starting point.
See? Simple list, big results!
Equipment Needed for Homemade Mozzarella Cheese
Okay, before we dive into the actual cheese-making magic, let’s talk about the tools you’ll need. Don’t worry, you probably have most of this stuff already! Having the right gear just makes the whole process smoother and safer.
- A **large pot**: You’ll need something big enough to hold a whole gallon of milk comfortably.
- A **thermometer**: This is key for getting the milk to the right temperature. A candy thermometer or an instant-read one works great.
- A **slotted spoon**: For gently lifting those beautiful curds out of the whey.
- A **colander and a bowl**: To drain the curds and catch the whey (you can save the whey!).
- A **microwave-safe bowl**: For heating the curds later on.
- **Heat-resistant gloves**: Seriously, DO NOT skip these! The cheese gets HOT when you’re stretching it, and these will save your hands.
That’s it! Gather these up, and you’re ready to make some cheese!
Step-by-Step Guide to Making Homemade Mozzarella Cheese
Okay, now for the fun part – making the cheese! This is where the magic happens. Just follow these steps carefully, and you’ll be pulling your own beautiful ball of **homemade mozzarella cheese** in no time. It’s really not as scary as it sounds, promise!
Heating the Milk for Homemade Mozzarella Cheese
First things first, grab that big pot and pour in your gallon of whole milk. Pop it on the stove over medium heat. Now, this is where your thermometer comes in handy! You want to heat the milk up to exactly 175°F (that’s about 79°C). Stir it gently every so often while it heats up, just to make sure the bottom doesn’t scorch. You don’t want burned milk bits in your cheese!
Forming the Curds for Homemade Mozzarella Cheese
Once your milk hits that sweet spot of 175°F, take the pot off the heat right away. In that little bowl you prepped, you mixed the white vinegar and cold water, right? Slowly, *slowly* pour that vinegar mixture into the hot milk. As you pour, stir gently for about 30 seconds. You’ll start to see the milk looking… well, curdly! It’s separating! Now, just leave it alone. Let it sit there, undisturbed, for 10 to 15 minutes. This gives the curds time to really separate nicely from the yellowish liquid (that’s the whey!).
Stretching and Shaping Your Homemade Mozzarella Cheese
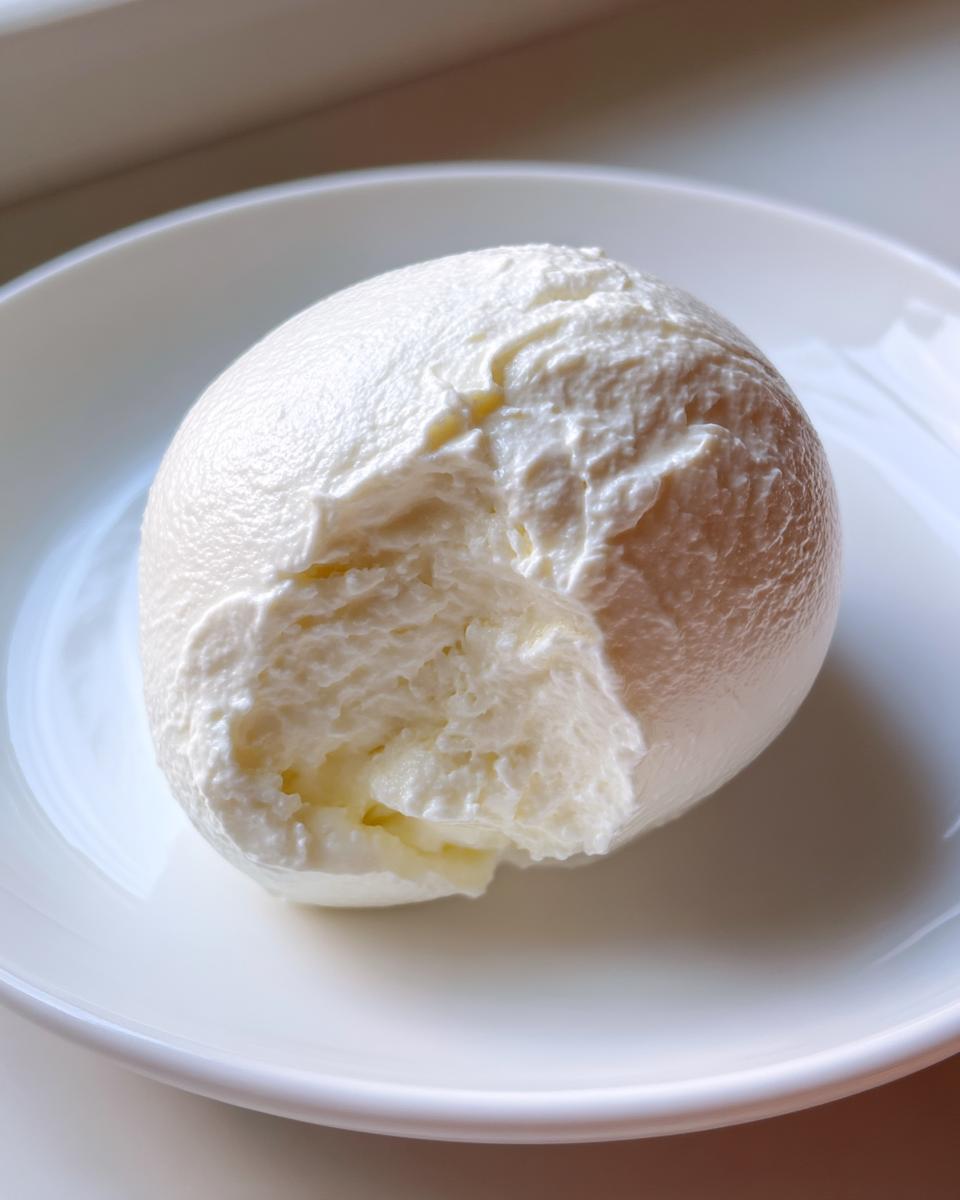
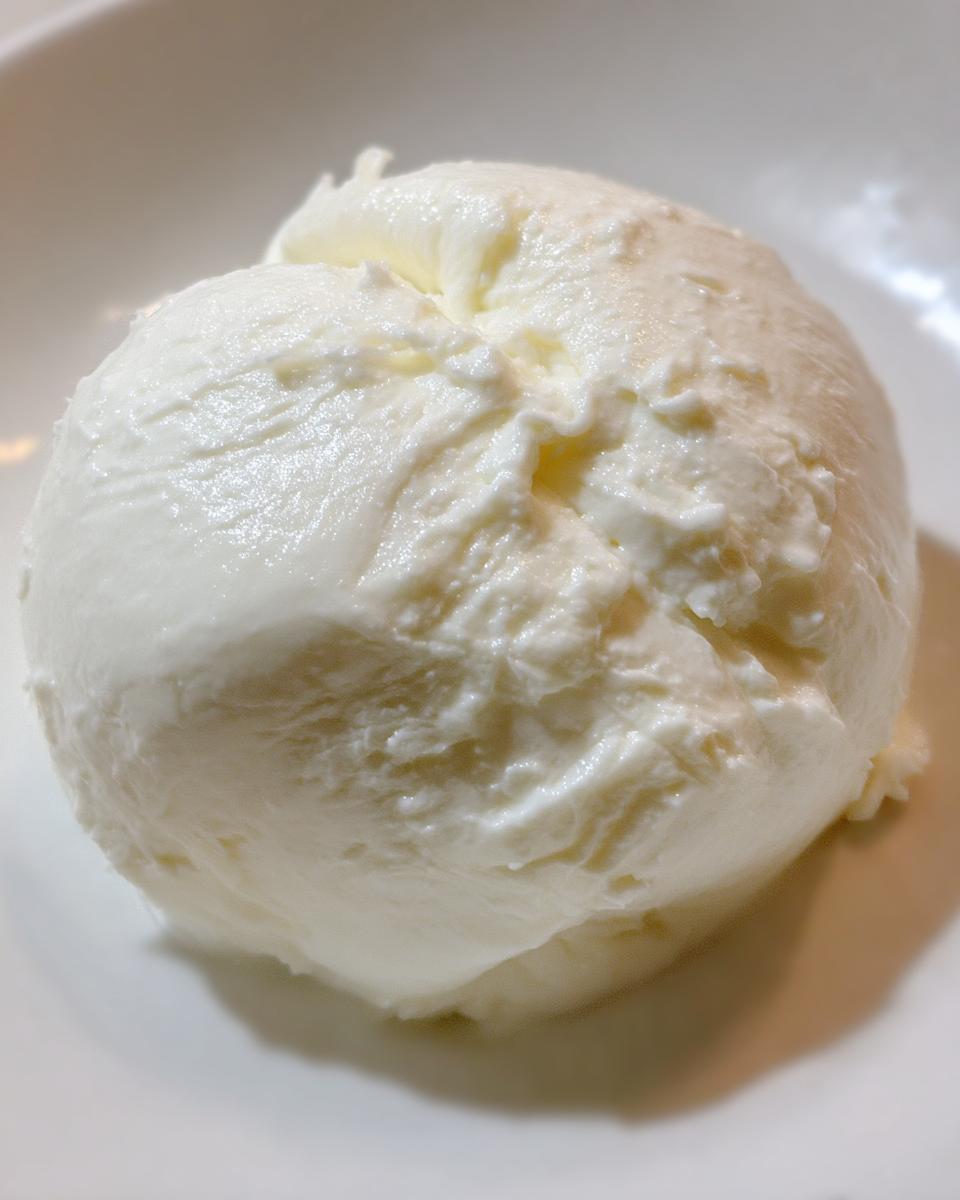
Okay, the curds should be looking solid now. Gently lift them out using your slotted spoon and put them in the colander over a bowl to drain. Give them a little gentle press to get some more whey out. Now, transfer the curds to your microwave-safe bowl. Microwave them on high for 30 seconds. Careful! They’ll be hot. Drain any liquid that comes out. Now, put on those heat-resistant gloves! This is crucial. Gently stretch and fold the cheese. It might break at first, that’s okay. Microwave again for another 15-30 seconds if it cools down and gets hard to work with. Keep stretching and folding until it’s smooth and looks like shiny, elastic dough. Add your salt now and keep stretching until it’s mixed in evenly. Finally, shape it into a ball or whatever shape you like! Plop it into a bowl of ice water for 10-15 minutes to firm up. Ta-da! **Homemade mozzarella cheese**!
Tips for Perfect Homemade Mozzarella Cheese
Making **homemade mozzarella cheese** is pretty straightforward, but a few little tricks can make all the difference between ‘okay’ and ‘WOW!’ Here are my go-to tips for getting it just right every time:
- Milk Matters: Seriously, check that milk carton! Make sure it says “pasteurized” but NOT “ultra-pasteurized.” This is the number one reason people have trouble with curds forming. Trust me on this one!
- Be Patient with the Stretch: Don’t rush the stretching and folding. It takes a few minutes of working the cheese to get that smooth, elastic texture. If it feels tough or breaks, it probably needs more heat.
- Gloves, Gloves, Gloves!: I know I mentioned it, but PLEASE use good heat-resistant gloves when stretching. The cheese gets really hot from the microwave, and you don’t want to burn your hands!
- Troubleshooting Tough Cheese: If your cheese feels tough and rubbery instead of stretchy, it usually means it wasn’t hot enough when you were stretching it. Pop it back in the microwave for another 15-30 seconds and try again.
- Don’t Toss the Whey!: That yellowish liquid left over? That’s whey! You can actually save it. It’s great for adding to bread dough, using in smoothies, or even cooking pasta in. Resourceful, right?
Follow these little pointers, and you’ll be making beautiful, stretchy **homemade mozzarella cheese** like a pro!
Serving Suggestions for Your Homemade Mozzarella Cheese
Okay, you’ve done it! You’ve made beautiful, fresh **homemade mozzarella cheese**. Now comes the best part: eating it! This stuff is so good, you really don’t need to do much to it. My absolute favorite way is just tearing off chunks and popping them in my mouth. But if you want to get fancy (or just make a meal), here are some ideas:
- Classic Caprese: Layer thick slices with fresh tomatoes and basil. Drizzle with good olive oil and a little balsamic glaze. Pure perfection!
- Pizza Perfection: Tear pieces over your pizza before baking. It melts like a dream and gets those amazing bubbly spots.
- Simple Sandwich Star: Stack it high on crusty bread with some pesto and roasted red peppers. Yum!
- Just Olive Oil and Basil: Honestly, sometimes all it needs is a drizzle of your best olive oil and a sprinkle of fresh basil. The flavors just sing!
Enjoy every bite!
Storing Homemade Mozzarella Cheese
So you’ve made this gorgeous, fresh ball of **homemade mozzarella cheese**! Now, how do you keep it happy and delicious? It’s pretty simple. The best way is to keep it in an airtight container in the refrigerator. If you want, you can store it in a little bit of its own whey (if you saved some) or even just some lightly salted water. This helps keep it moist. It’s best enjoyed fresh, within about 3-4 days. It won’t last as long as the store stuff because it doesn’t have all those preservatives, but trust me, it’s so good, it probably won’t stick around that long anyway!
Frequently Asked Questions About Homemade Mozzarella Cheese
Got questions about making your own **homemade mozzarella cheese**? Totally normal! Here are some of the most common things people ask, and my best answers to help you out:
Q: Why didn’t my curds form?
A: This is usually because of the milk! Make sure you’re using *not* ultra-pasteurized whole milk. That super-high heat process changes the protein structure and prevents the curds from separating properly. Also, make sure your milk got hot enough (175°F is key!) and you gave it enough time to rest after adding the vinegar.
Q: Can I use a different type of milk?
A: For this recipe, whole milk is really the best. The fat content helps with the texture and flavor. You *can* try with 2% milk, but you might get a slightly lower yield and a less rich cheese. Skim milk usually doesn’t work well at all for this kind of cheese.
Q: How long does homemade mozzarella last?
A: Since it’s so fresh and doesn’t have preservatives, it’s best enjoyed within 3-4 days when stored properly in an airtight container in the fridge, maybe with a little salted water or whey to keep it moist. It’s so delicious though, it probably won’t last that long anyway!
Q: Can I freeze homemade mozzarella cheese?
A: You *can* freeze it, but the texture might change a bit. It can become a little more crumbly or watery when thawed. It’s usually still fine for melting on pizza or in cooked dishes, but maybe not as good for slicing for a caprese salad. If you do freeze it, wrap it tightly first!
Estimated Nutritional Information
Okay, so while I’m definitely not a nutritionist, I wanted to give you a general idea of what’s in this delicious **homemade mozzarella cheese**. Just keep in mind that these numbers are estimates! They can totally change based on the specific milk you use and even how much whey drains off. Think of this as a helpful guideline, not a strict rulebook!
Share Your Homemade Mozzarella Cheese Success!
Alright, you’ve made it! How did your **homemade mozzarella cheese** turn out? I’d absolutely LOVE to hear about it! Leave a comment below and let me know how it went. Did you put it on pizza? Make a gorgeous caprese salad? Or just eat it straight from the bowl (no judgment here!)? Don’t forget to rate the recipe too! And if you snap a pic, totally share it on social media and tag me – seeing your kitchen wins makes my day!
Print
Shockingly Easy Homemade Mozzarella Cheese in 1 Step
- Total Time: 50 minutes
- Yield: 1-1.5 pounds 1x
- Diet: Vegetarian
Description
Make your own fresh mozzarella cheese at home with this simple recipe. It’s easier than you think and the result is delicious.
Ingredients
- 1 gallon whole milk (not ultra-pasteurized)
- 1/2 cup white vinegar
- 1/4 cup cold water
- 1/2 teaspoon salt
Instructions
- Heat milk in a large pot over medium heat until it reaches 175°F (79°C). Stir occasionally to prevent scorching.
- While the milk heats, mix vinegar and cold water in a small bowl.
- Remove milk from heat. Slowly pour in the vinegar mixture, stirring gently for about 30 seconds.
- Let the mixture sit undisturbed for 10-15 minutes until curds separate from the whey.
- Using a slotted spoon, gently lift the curds out of the pot and place them in a colander set over a bowl to drain.
- Gently press the curds to remove excess whey.
- Transfer the curds to a microwave-safe bowl. Microwave on high for 30 seconds. Drain any accumulated whey.
- Using gloves (the cheese will be hot), gently stretch and fold the cheese until it becomes smooth and elastic. If it cools down and becomes difficult to work with, microwave again for 15-30 seconds.
- Add salt and continue stretching until evenly distributed.
- Shape the cheese into a ball or desired shape.
- Place the mozzarella in a bowl of ice water for 10-15 minutes to cool and firm up.
- Store the mozzarella in an airtight container in the refrigerator.
Notes
- Using ultra-pasteurized milk will prevent curds from forming properly.
- Be patient when stretching the cheese; it takes a few minutes to become smooth.
- You can save the whey for other uses like baking or smoothies.
- Prep Time: 20 minutes
- Cook Time: 20 minutes
- Category: Cheese
- Method: Heating and Stretching
- Cuisine: Italian
Nutrition
- Serving Size: 1 ounce
- Calories: 90
- Sugar: 1
- Sodium: 170
- Fat: 7
- Saturated Fat: 4
- Unsaturated Fat: 3
- Trans Fat: 0
- Carbohydrates: 1
- Fiber: 0
- Protein: 7
- Cholesterol: 20
Keywords: homemade mozzarella, fresh cheese, mozzarella recipe, cheese making