
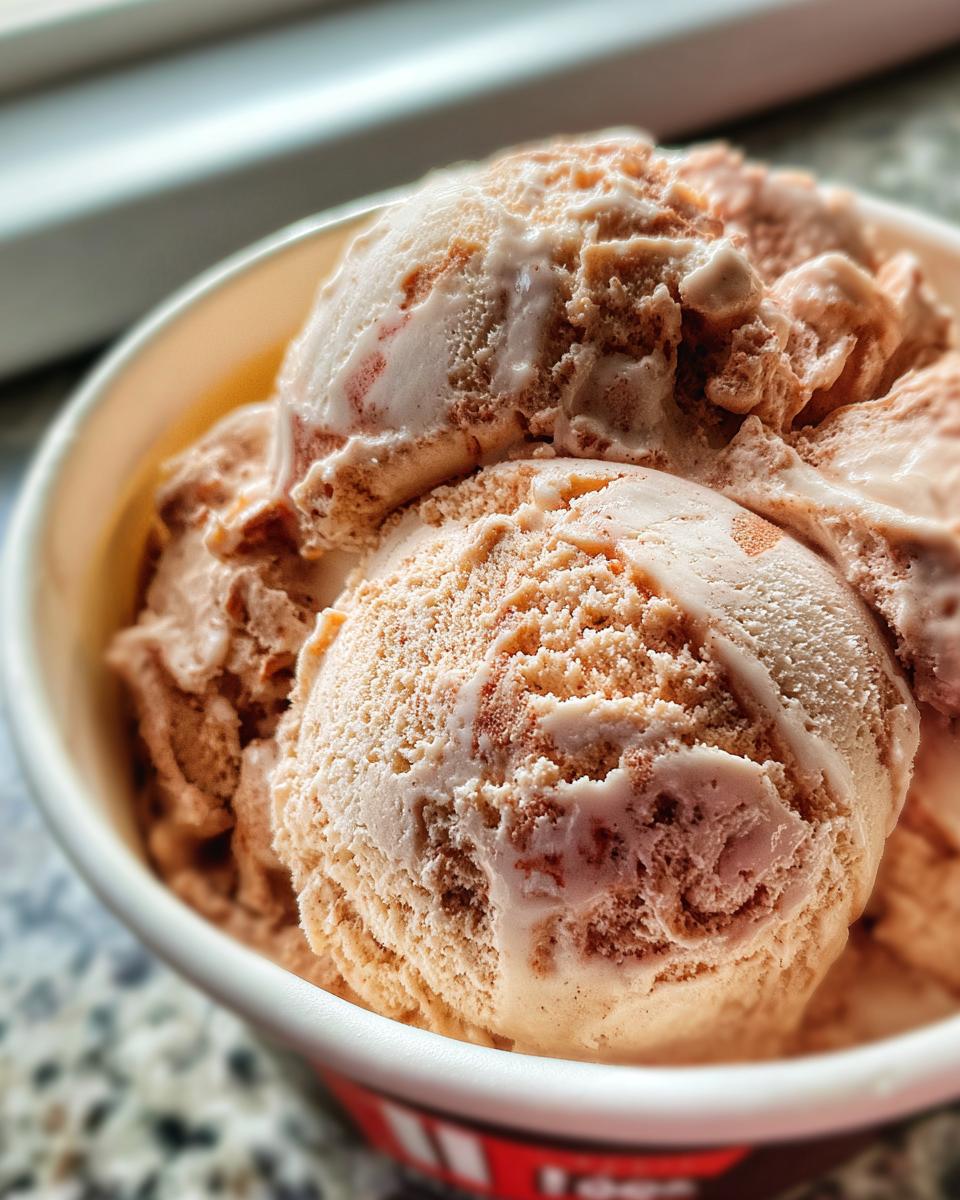
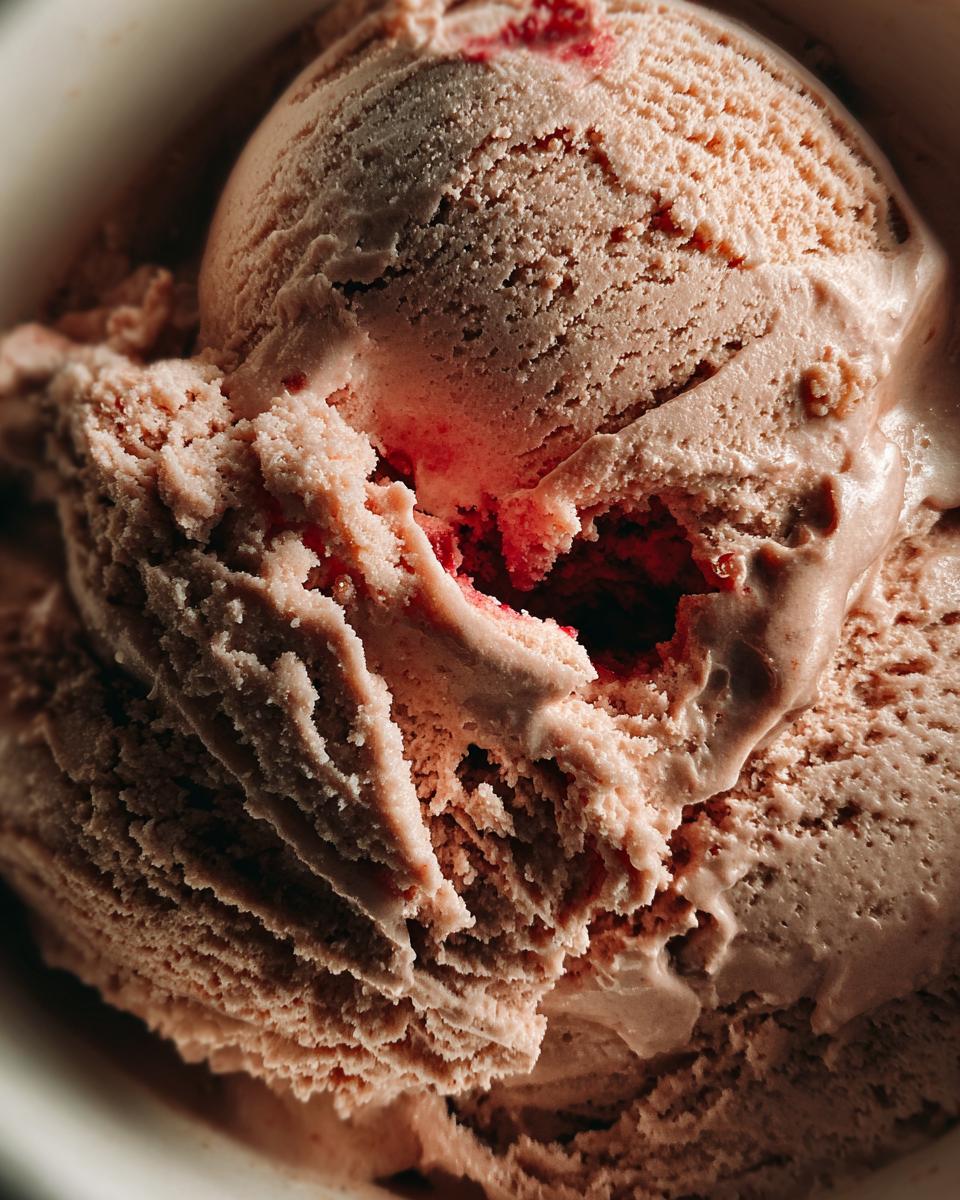
Okay, guys, get ready for this! I know it sounds a little wild, but trust me on this one. We’re diving into the world of Dr Pepper Ice Cream!! No-churn recipe, and it’s going to blow your mind. Seriously. I mean, who thinks of putting soda in ice cream? Well, someone brilliant, obviously!
My best friend, Sarah, is OBSESSED with Dr Pepper. Like, wouldn’t-drink-anything-else obsessed. So for her birthday last year, I wanted to do something totally unexpected. I stumbled upon the idea of soda ice cream and thought, why not Dr Pepper? It has that unique, almost spicy, cherry-cola thing going on. And the best part? This is a NO-CHURN recipe, which means zero fancy equipment needed. If you can whip cream, you can make this!
It turned out even better than I imagined. Creamy, sweet, and with that unmistakable Dr Pepper kick. Sarah was over the moon, and honestly, so was I. It’s just so fun and different! Let’s get started, shall we?

Why You’ll Love This Dr Pepper Ice Cream!! No-Churn Recipe
Okay, so besides just being ridiculously fun to say, this Dr Pepper Ice Cream!! No-Churn recipe is going to become your new go-to for a quick, impressive treat. Why? Let me tell you!
- That Flavor! It’s got that signature Dr Pepper taste you know and love, but in a creamy, frozen form. Totally unique!
- Seriously Easy: No fancy ice cream maker required! If you’ve got a mixer and a freezer, you’re golden.
- Minimal Ingredients: You only need a handful of things you probably already have or can easily grab.
- Dr Pepper Fanatic Approved: If you or someone you know is obsessed with Dr Pepper, this is the ultimate dessert for them.
- Quick Prep: You can have this mixed and in the freezer in about 15 minutes. The hardest part is waiting for it to freeze!
It’s just one of those recipes that feels special without being complicated at all. You’re going to love it!
Gathering Your Ingredients for Dr Pepper Ice Cream!!
Alright, time to round up our goodies! The beauty of this Dr Pepper Ice Cream!! is how simple the ingredient list is. You just need four things, and they’re all pretty common. Make sure everything is nice and cold, especially that heavy cream – it whips up way better when it’s chilled!
- 2 cups cold heavy cream
- 1 (14 ounce) can sweetened condensed milk (make sure it’s condensed, not evaporated!)
- 1/2 cup Dr Pepper soda (straight from the can or bottle is fine)
- 1 teaspoon vanilla extract (the good stuff!)
That’s it! See? Told you it was easy. Now let’s get mixing!
Simple Steps for Making Dr Pepper Ice Cream!! No-Churn
Okay, let’s get down to business! Making this Dr Pepper Ice Cream!! No-Churn is so straightforward, you’ll wonder why you haven’t done it before. Just follow these simple steps, and you’ll be on your way to frozen soda bliss!
- Whip the Cream to Perfection: This is probably the most ‘active’ part of the recipe, but it’s easy! Pour your super cold heavy cream into a large mixing bowl. Grab your stand mixer with the whisk attachment or use a hand mixer. Start on low speed and gradually increase to high. Whip, whip, whip! You’re looking for stiff peaks. What does that mean? When you lift the whisk out of the cream, the peaks should stand straight up and hold their shape. Don’t overmix though, or you’ll end up with butter! It usually takes about 3-5 minutes depending on your mixer.
- Combine the Dr Pepper Ice Cream!! Flavor Base: While your cream is doing its thing (or after you’ve whipped it), grab a separate medium-sized bowl. Pour in your sweetened condensed milk. Add the Dr Pepper (yes, the soda!) and the vanilla extract. Give it a good whisk until everything is nicely combined and looks smooth. It might look a little thin, but don’t worry, the whipped cream will thicken everything up.
- Gently Fold for Light and Airy Dr Pepper Ice Cream!!: This step is KEY for that lovely, airy texture in your no-churn ice cream. Take about a third of your whipped cream and dollop it into the Dr Pepper mixture. Use a spatula and gently fold it in. Think of it like scooping under the mixture and lifting it over the whipped cream, turning the bowl as you go. Once that’s mostly combined, add the rest of the whipped cream in two more additions, folding gently each time until there are no streaks of whipped cream left. You want it just combined, not overworked, or you’ll lose all that lovely air you whipped in!
- Freeze Your Dr Pepper Ice Cream!! Creation: Now for the final easy bit before the waiting game! Pour your beautiful Dr Pepper Ice Cream!! mixture into a freezer-safe container. A loaf pan works great, or any container with a lid. Smooth the top with your spatula. Pop a lid on it (or cover tightly with plastic wrap) and place it in the freezer. It needs at least 6 hours to firm up properly. Overnight is even better! You want it solid, like regular ice cream.
See? So easy! Now comes the hardest part: waiting. Go find something fun to do while your amazing Dr Pepper Ice Cream!! gets frosty!
Step 1: Whip the Cream to Perfection
Okay, this is where we build the foundation for our creamy goodness. Get your coldest heavy cream – seriously, the colder the better! Pour it into your mixing bowl. Now, turn on that mixer! Start slow to avoid splashes, then crank it up to high. Watch it go from liquid to soft peaks (they’ll flop over when you lift the whisk) to stiff peaks (they stand up straight!). Stop right when they’re stiff. You’ll know it when you see it!
Step 2: Combine the Dr Pepper Ice Cream!! Flavor Base
While the cream is doing its thing, or after you’ve whipped it, grab that second bowl. Pour in the whole can of sweetened condensed milk. Add your splash of Dr Pepper and the vanilla extract. Give it a good whisk. It’ll be a little thinner than the condensed milk alone, but that’s exactly what we want. This is where all that unique Dr Pepper flavor comes in!
Step 3: Gently Fold for Light and Airy Dr Pepper Ice Cream!!
This is a gentle operation! Take some of your whipped cream and add it to the Dr Pepper mixture. Now, grab your spatula. You’re not stirring like crazy! You’re going to scoop from the bottom and lift it over the top, turning the bowl as you go. This is called folding, and it keeps all that lovely air you whipped into the cream, which makes the ice cream light and not dense. Add the rest of the whipped cream in a couple of batches, folding just until everything is combined. Don’t see any white streaks? Perfect!
Step 4: Freeze Your Dr Pepper Ice Cream!! Creation
Almost there! Pour that beautiful, bubbly mixture into your container. Smooth the top if you like. Cover it up tightly – you don’t want any ice crystals forming! Now, tuck it into the freezer. It needs a good long chill, at least 6 hours. I usually just leave mine overnight to be sure. You want it nice and firm before you scoop into it!
Equipment Needed for Dr Pepper Ice Cream!!
Good news! You don’t need a ton of fancy equipment for this Dr Pepper Ice Cream!! recipe. Chances are, you already have everything you need right in your kitchen. Here’s what you’ll want to grab:
- A stand mixer with a whisk attachment OR a hand mixer (for whipping that cream!)
- Two good-sized mixing bowls (one for the cream, one for the Dr Pepper mix)
- A whisk (for the condensed milk part)
- A spatula (essential for gentle folding!)
- A freezer-safe container (anything from a loaf pan to a plastic container with a lid works great)
See? Super basic stuff. Now you have no excuse not to make this!
Tips for Perfect Dr Pepper Ice Cream!!
Okay, making this Dr Pepper Ice Cream!! is pretty foolproof, but a few little insider tips can take it from great to absolutely amazing. Trust me on these!
- Keep it COLD: Your heavy cream *must* be super cold to whip up properly. Pop it in the fridge right before you’re ready to use it.
- Don’t Overmix: When you’re folding the Dr Pepper mixture into the whipped cream, stop as soon as there are no more white streaks. Overmixing will knock all the air out, and you’ll end up with a denser ice cream. We want light and airy!
- Freeze Solid: Give it the full freezing time! Rushing it means soft, unset ice cream. Let it freeze for at least 6 hours, or even better, overnight. Patience is key here!
- Container Matters: Make sure your freezer container has a tight-fitting lid. This helps prevent those annoying ice crystals from forming on top.
Follow these simple tips, and you’re guaranteed a scoop of delicious Dr Pepper goodness!
Dr Pepper Ice Cream!! Variations and Serving Suggestions
While this Dr Pepper Ice Cream!! is absolutely divine on its own, you can totally play around with it! Want a little crunch or extra sweetness? Go for it! You could gently fold in some mini chocolate chips or even some chopped nuts (pecans or walnuts would be yummy!) right before you pour it into the freezer container. Just don’t go crazy with the folding after adding them.
When it comes to serving, keep it simple and fun! A scoop (or two!) in a bowl or cone is perfect. But if you want to get fancy, add a dollop of whipped cream and maybe a maraschino cherry on top – just like a classic soda shop float, but in ice cream form! It’s a total conversation starter, and everyone will be asking for the recipe.
Storing and Reheating Dr Pepper Ice Cream!!
Okay, if you actually have any Dr Pepper Ice Cream!! leftovers (which is a big *if* in my house!), storing it is super simple. Just make sure it’s in that airtight freezer container you used. Press a piece of plastic wrap directly onto the surface of the ice cream before putting the lid on – this is a little trick to prevent ice crystals. It will keep well in the freezer for a couple of weeks, but honestly, it’s best enjoyed within the first few days for the creamiest texture! No reheating needed, just scoop and enjoy!
Frequently Asked Questions About Dr Pepper Ice Cream!!
Got questions about this wild and wonderful Dr Pepper Ice Cream!!? Totally understandable! Here are some common ones I get asked:
Q: Can I use diet Dr Pepper?
Honestly, I haven’t tried the diet version myself for this no-churn ice cream. The sugar in the regular Dr Pepper helps with the texture and prevents it from freezing too hard. Diet sodas just don’t have that same sugar structure, so the results might be different. I’d stick to the regular stuff for the best outcome!
Q: How long does this homemade Dr Pepper ice cream last in the freezer?
If you store it properly in an airtight container, it should last a couple of weeks. But like most homemade ice cream recipes, the texture is best enjoyed in the first few days. After that, it can start to get a little more icy.
Q: Can I make this with other sodas?
Absolutely! The no-churn base works with lots of flavors. You could totally experiment with other sodas like root beer (hello, root beer float ice cream!), cherry cola, or even orange soda. Just swap out the Dr Pepper for the same amount of your favorite fizzy drink! It’s a fun way to create unique dessert flavors.
Hopefully, that clears things up! This easy Dr Pepper dessert is meant to be fun and delicious, so don’t stress too much and just enjoy the process!
Estimated Nutritional Information
Okay, so while we’re definitely making this Dr Pepper Ice Cream!! because it’s delicious and fun, I know some of you might want a general idea of what you’re scooping into. Keep in mind, this is just an *estimate* based on the ingredients. Things like exact brands can make a tiny difference, and obviously, how big your “serving” is really matters!
Based on roughly dividing the whole batch into 6 servings, here’s what you’re looking at:
- Calories: Around 450 per serving
- Total Fat: About 35g (with roughly 22g of that being saturated fat)
- Cholesterol: About 120mg
- Sodium: Around 70mg
- Total Carbohydrates: Roughly 30g (with about 40g of sugar – remember that sweetened condensed milk and the Dr Pepper!)
- Protein: About 5g
Like I said, this is just a ballpark! It’s definitely a rich, indulgent treat, perfect for a special occasion rather than an everyday snack. But hey, it’s homemade ice cream, and it’s got Dr Pepper in it! Enjoy every single bite!
Print
Dr Pepper Ice Cream!! Shocking 4 Ingredients
- Total Time: 6 hours 15 minutes
- Yield: 6 servings 1x
- Diet: Vegetarian
Description
Easy no-churn ice cream with the unique flavor of Dr Pepper.
Ingredients
- 2 cups heavy cream
- 1 (14 ounce) can sweetened condensed milk
- 1/2 cup Dr Pepper soda
- 1 teaspoon vanilla extract
Instructions
- Whip the heavy cream until stiff peaks form.
- In a separate bowl, whisk together the sweetened condensed milk, Dr Pepper, and vanilla extract.
- Gently fold the Dr Pepper mixture into the whipped cream until combined.
- Pour the mixture into a freezer-safe container.
- Freeze for at least 6 hours, or until firm.
Notes
- For a stronger Dr Pepper flavor, reduce the Dr Pepper to 1/4 cup.
- Add chocolate chips or chopped nuts for extra texture and flavor.
- Serve immediately after freezing for the best texture.
- Prep Time: 15 minutes
- Cook Time: 0 minutes
- Category: Dessert
- Method: No-Churn
- Cuisine: American
Nutrition
- Serving Size: 1/6 of recipe
- Calories: 450
- Sugar: 40g
- Sodium: 70mg
- Fat: 35g
- Saturated Fat: 22g
- Unsaturated Fat: 8g
- Trans Fat: 0g
- Carbohydrates: 30g
- Fiber: 0g
- Protein: 5g
- Cholesterol: 120mg
Keywords: Dr Pepper, ice cream, no-churn, dessert, soda, sweet, homemade